Pixel perfection in godot
2018-07-01
I've been using Godot since the 2.1 days, I read somewhere that Godot supported “pixel perfect” games, but at the time I only had a vague idea of what that meant.
Fast forward to the present. I've decided to check if my intuitions were true.
Disclaimer: Before we go any further, I'm not an artist, nor a graphics programmer, I'm using the definition of pixel very loosely here, if you spot any mistake on this article, please tweet me @alvarber.
What is pixel perfect?
Pixel perfect has various meanings depending on the context, in this case I'm referring to the idea of every pixel on the interface being correspondent with either one or a fixed multiple of pixels on the screen.
This is specially important for pixel art games, as not being careful can result in all kinds of visual artifacts.
For the examples shown in this article we have set a 320x180 resolution, something kinda close to NES 256x240 resolution, but on a convenient 16:9 aspect ratio.
I want the every pixel to always have the same size no matter where it is, while also rendering the art as big as possible.
There are two main ways to accomplish this, Stretch settings, and Viewport API.
Stretch Settings
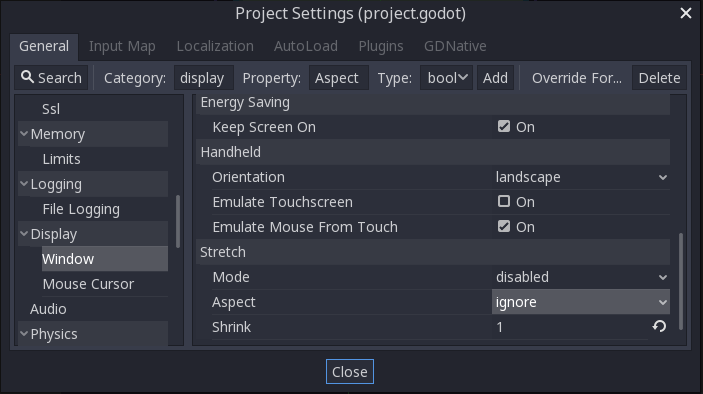
As you can see there are three different settings in the Stretch section.
Starting from last, Shrink simply represents the zoom level.
Mode is a bit more complicated, it determines how Aspect is applied.
2D means that aspect will be applied to all Node2D nodes, but not to the GUI.
Viewport on the other hand does affect the Control nodes as well.
Finally Aspect controls how the image gets distorted, cropped or if black
bars are added.
This question in godotengine.org explains the stretch options. Also if you want to read more about these, check Godot Engine and pixel art: A better love story than Twilight.
Pixel Snap
There is one setting we will use.
Pixel snap can be found in Rendering>Quality>2D.
Forces sprites on screen to conform onto the grid, setting it on forbids
“rotated” or half pixels.
This is an aesthetic choice, for this tutorial we will set it.
These settings might be sufficient for quick prototypes or games where you can predict the size of the screen, however is not enough for this case.
Float scaling
Float scaling means that we are scaling pixels by float amounts, this can result in pixels sometimes scaling by a different amount compared to their peers.
Black bars
As cinematic as they might be, black bars are not everybody's cup of tea. We have seen how they appear when aspect ratios mismatch on different settings. Other pixel games such as Nuclear Throne or Towerfall feature colorful and varied pixel patterns on the background that look more apt.
Viewport API
So what if we want to scale only when it is completely safe (i.e integer-only scaling). What if we wish to control what is shown on the edges of the screen instead of the default black bars?
In that case, we can use the Viewport API to more finely control the rendering and scaling of our viewports.
In fact, we have been manipulating the viewport the whole time, the default settings are just some functions that operate on the root viewport.
If you are just starting on Godot you may not know this, but at the root of the node tree there is a viewport that is inserted automatically, you can see it if you run your game and explore the live tree.
We can split our problems into two smaller concerns, have a viewport only grow on multiples of our desired resolution, and have a “camera” that zooms by that multiple.
Camera2DPixelPerfect
Essentially we want to zoom by an integer amount when is possible, so if the viewport resolution is 640x360 we want to scale by 2, if its 960x540 by 3, so on and so forth.
We can start by creating a Camera2D, make sure to set it to current, and
disable both Drag Margin H and Drag Margin V.
Add the following script to the node.
extends Camera2D

export var DESIRED_RESOLUTION = Vector2(320, 180)
var vp
var scaling_factor = 1

func _ready():
  vp = get_viewport()
  vp.connect(
    "size_changed", self, "on_vp_size_change"
  )
  on_vp_size_change()

func on_vp_size_change():
  var scale_vector = vp.size / DESIRED_RESOLUTION
  var new_scaling_factor = max(floor(min(scale_vector[0], scale_vector[1])), 1)
  if new_scaling_factor != scaling_factor:
    scaling_factor = new_scaling_factor
    zoom = Vector2(1 / scaling_factor, 1 / scaling_factor)
Let's explore it piece by piece
extends Camera2D

export var DESIRED_RESOLUTION = Vector2(320, 180)
var vp
var scaling_factor = 1
The first line just represent the class we are inheriting, it should be there when you create the scripts, if it's any other value you haven't instanced a Camera2D.
After that we have class members/variables, DESIRED_RESOLUTION is pretty
self-explanatory, vp will point to the parent viewport, and scaling factor
it's the zoom level, we set it to 1 so that by default it won't be zoomed.
func _ready():
  vp = get_viewport()
  vp.connect(
    "size_changed", self, "on_vp_size_change"
  )
  on_vp_size_change()
In the class constructor we use signals to be notified every time the viewport changes size, in the simplest case every time the window is resized.
If you don't know what _ready() or signals are, check the links to the official Godot documentation.
func on_vp_size_change():
  var scale_vector = vp.size / DESIRED_RESOLUTION
  var new_scaling_factor = max(floor(min(scale_vector[0], scale_vector[1])), 1)
  if new_scaling_factor != scaling_factor:
    scaling_factor = new_scaling_factor
    zoom = Vector2(1 / scaling_factor, 1 / scaling_factor)
Finally the callback function, we divide the actual viewport size by the desired resolution, we get the biggest of the two dimensions and in case is less than 1 we set it to 1. This is the new scaling factor, if it's different than the previous one we apply it.
An unfortunate implementation detail is that because we are dividing 1 between the scaling factor we are setting the zoom to floating numbers, and floating numbers are icky when we are looking for precision, it is probably fine for big numbers like 0.5, 0.3, 0.25, but given a small enough float number we could theoretically introduce a "float scaling" due to rounding.
What if we want to be really pedantic and "zoom" only using integers? And if we want to customize the Camera2D behavior beyond the available API? According to Godot Docs we have to extend Node2D and manipulate the canvas directly. And we are going to do just that.
This is for the sake of completion, if you don't need that level of control, the previous solution will work just fine.
Camera2DPixelPerfecter
This time we create a new Node2D, and add the following script.
extends Node2D

export var DESIRED_RESOLUTION = Vector2(320, 180)
var vp
var scaling_factor = 1

func _ready():
  vp = get_viewport()
  vp.connect(
    "size_changed", self, "on_vp_size_change"
  )
  on_vp_size_change()

func _process(delta):
  get_viewport().canvas_transform.origin = (
    (-get_parent().position * scaling_factor) +
    (get_viewport().size / 2)
  )

func on_vp_size_change():
  var scale_vector = vp.size / DESIRED_RESOLUTION
  var new_scaling_factor = max(floor(min(scale_vector[0], scale_vector[1])), 1)
  if new_scaling_factor != scaling_factor:
    scaling_factor = new_scaling_factor
    var default_transform = Transform2D(Vector2(1, 0), Vector2(0, 1), Vector2())
    vp.canvas_transform = (
      default_transform.scaled(Vector2(scaling_factor, scaling_factor))
    )
Most of the code will look exactly the same, let's check the differences.
func on_vp_size_change():
  var scale_vector = vp.size / DESIRED_RESOLUTION
  var new_scaling_factor = max(floor(min(scale_vector[0], scale_vector[1])), 1)
  if new_scaling_factor != scaling_factor:
    scaling_factor = new_scaling_factor
    var default_transform = Transform2D(Vector2(1, 0), Vector2(0, 1), Vector2())
    vp.canvas_transform = (
      default_transform.scaled(Vector2(scaling_factor, scaling_factor))
    )
The only difference with our old callback is the way we apply the scaling factor, this time we set the canvas transform. What is the canvas transform? Essentially a 3x2 matrix that represents an origin and two dimensions, by scaling the dimensions vectors we scale the whole thing.
func _process(delta):
  get_viewport().canvas_transform.origin = (
    (-get_parent().position * scaling_factor) +
    (get_viewport().size / 2)
  )
This keeps the player centered on screen, we need to replicate it because we
are not extending Camera2D.
And that's it, I've been told you can also use Viewport.set_size_override,
but I haven't had an opportunity to check that one.
Expanding Viewport
Viewport size can be manually manipulated through the size property, but you
have no access to margins-like property, Godot has a much better system for
this...
Containers! They lift the weight of manually manipulating UI elements size.
In our particular case the best way to make is to have a ViewportContainer,
this container is specifically designed to take care of all viewport resizing
needs.
Also by setting the size via margins and setting all anchors to 0.5 it will
stay centered.
So we will create a Scene with a Viewport inside a ViewportContainer.
We will also create some background patterns.
Set ViewportContainer script to the following.
extends ViewportContainer

export var DESIRED_RESOLUTION = Vector2(320, 180)
var scaling_factor = 0

func _ready():
  get_viewport().connect(
    "size_changed", self, "on_vp_size_change"
  )
  on_vp_size_change()

func on_vp_size_change():
  var scale_vector = get_viewport().size / DESIRED_RESOLUTION
  var new_scaling_factor = max(floor(min(scale_vector[0], scale_vector[1])), 1)
  # Only scale when there is a change
  if new_scaling_factor != .scaling_factor:
    scaling_factor = new_scaling_factor
    var vp_size = DESIRED_RESOLUTION * scaling_factor
    margin_left = -vp_size[0] / 2
    margin_right = vp_size[0] / 2
    margin_top = -vp_size[1] / 2
    margin_bottom = vp_size[1] / 2
We set the margins so it stays centered, there are probably better ways to do it.
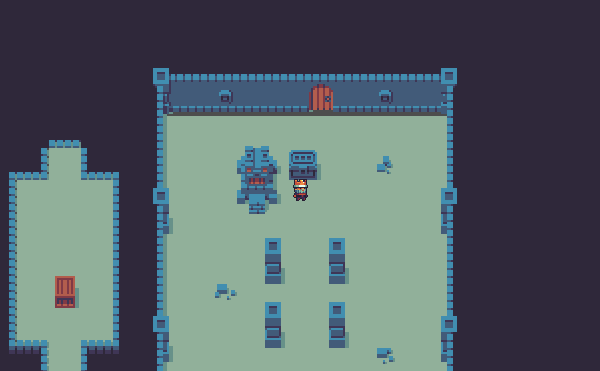
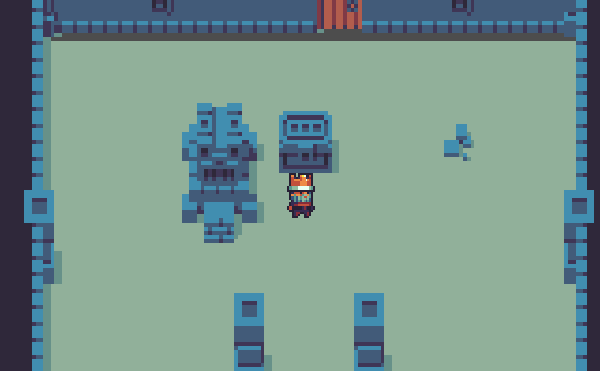
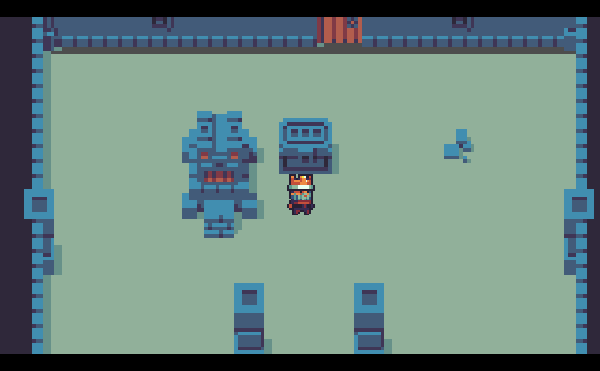
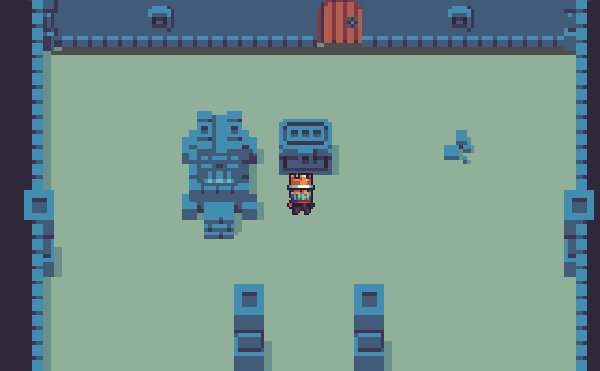
Result
We could go even further, for example expanding the viewport only on the y axis while restricting x axis to multiples only, this modifies the amount of actual "game" that is seen depending on window size on the y dimension, but in exchange background filler will only be seen on the sides, not on the top or bottom.
You can find all the code from this article at gitlab.
Know Issues
Thanks to @Securas2010 for pointing out that playing around with zoom will interfere with your parallax.
Additional Sources
Game From Scratch compares the difference between stretch modes.
We have proved that this Github issue is solvable by just the viewport API.